A very very loose play by play: Kimono
I hesitate to call this a tutorial because I’m still figuring out ways to make this. This is a a loose guide as to what I’m doing at best.
Disclaimer: I just realized that in most of the yellow yukata pictures in here I have the right side folded over the left. I should have taken the pictures with the left side folded over the right…right over left is only ok if you’re being buried. This will be rectified in the obi pictures.
After making the Mary Frances Kimono/Robe I set out to make a kimono/yukata for my doll. I actually have three in progress, each one trying a different attack. The one I’ll be showing is the third.
An actual kimono is very rectangular. It’s literally ALL rectangles. The back is one rectangle, The front is the same rectangle slashed in half with an additional piece on each side.

This is part of the first kimono in progress.


With a kimono/yukata you get wrapped tightly in undergarments until you’re cylinder-shaped. You can’t change a doll’s shape. Disney Animator’s Dolls have round tummies and narrower shoulders. I merged the front pieces into two simple shapes (to eliminate that extra seam) and made them slightly narrower at the top.
The yukata I’ll show from now on is a maybe gift. My friend, Realafterglow, is in the country. She’s giving a relative (a niece I think) the Tiana doll. I decided to make a yukata in a yellow Japanese fabric similar to Tiana’s cooking dress color and I’ve found a darker frog-print fabric for an Obi belt. If Real Afterglow thinks her niece would enjoy it. It’s hers.
This is the rough pattern I made:

Back: cut 1
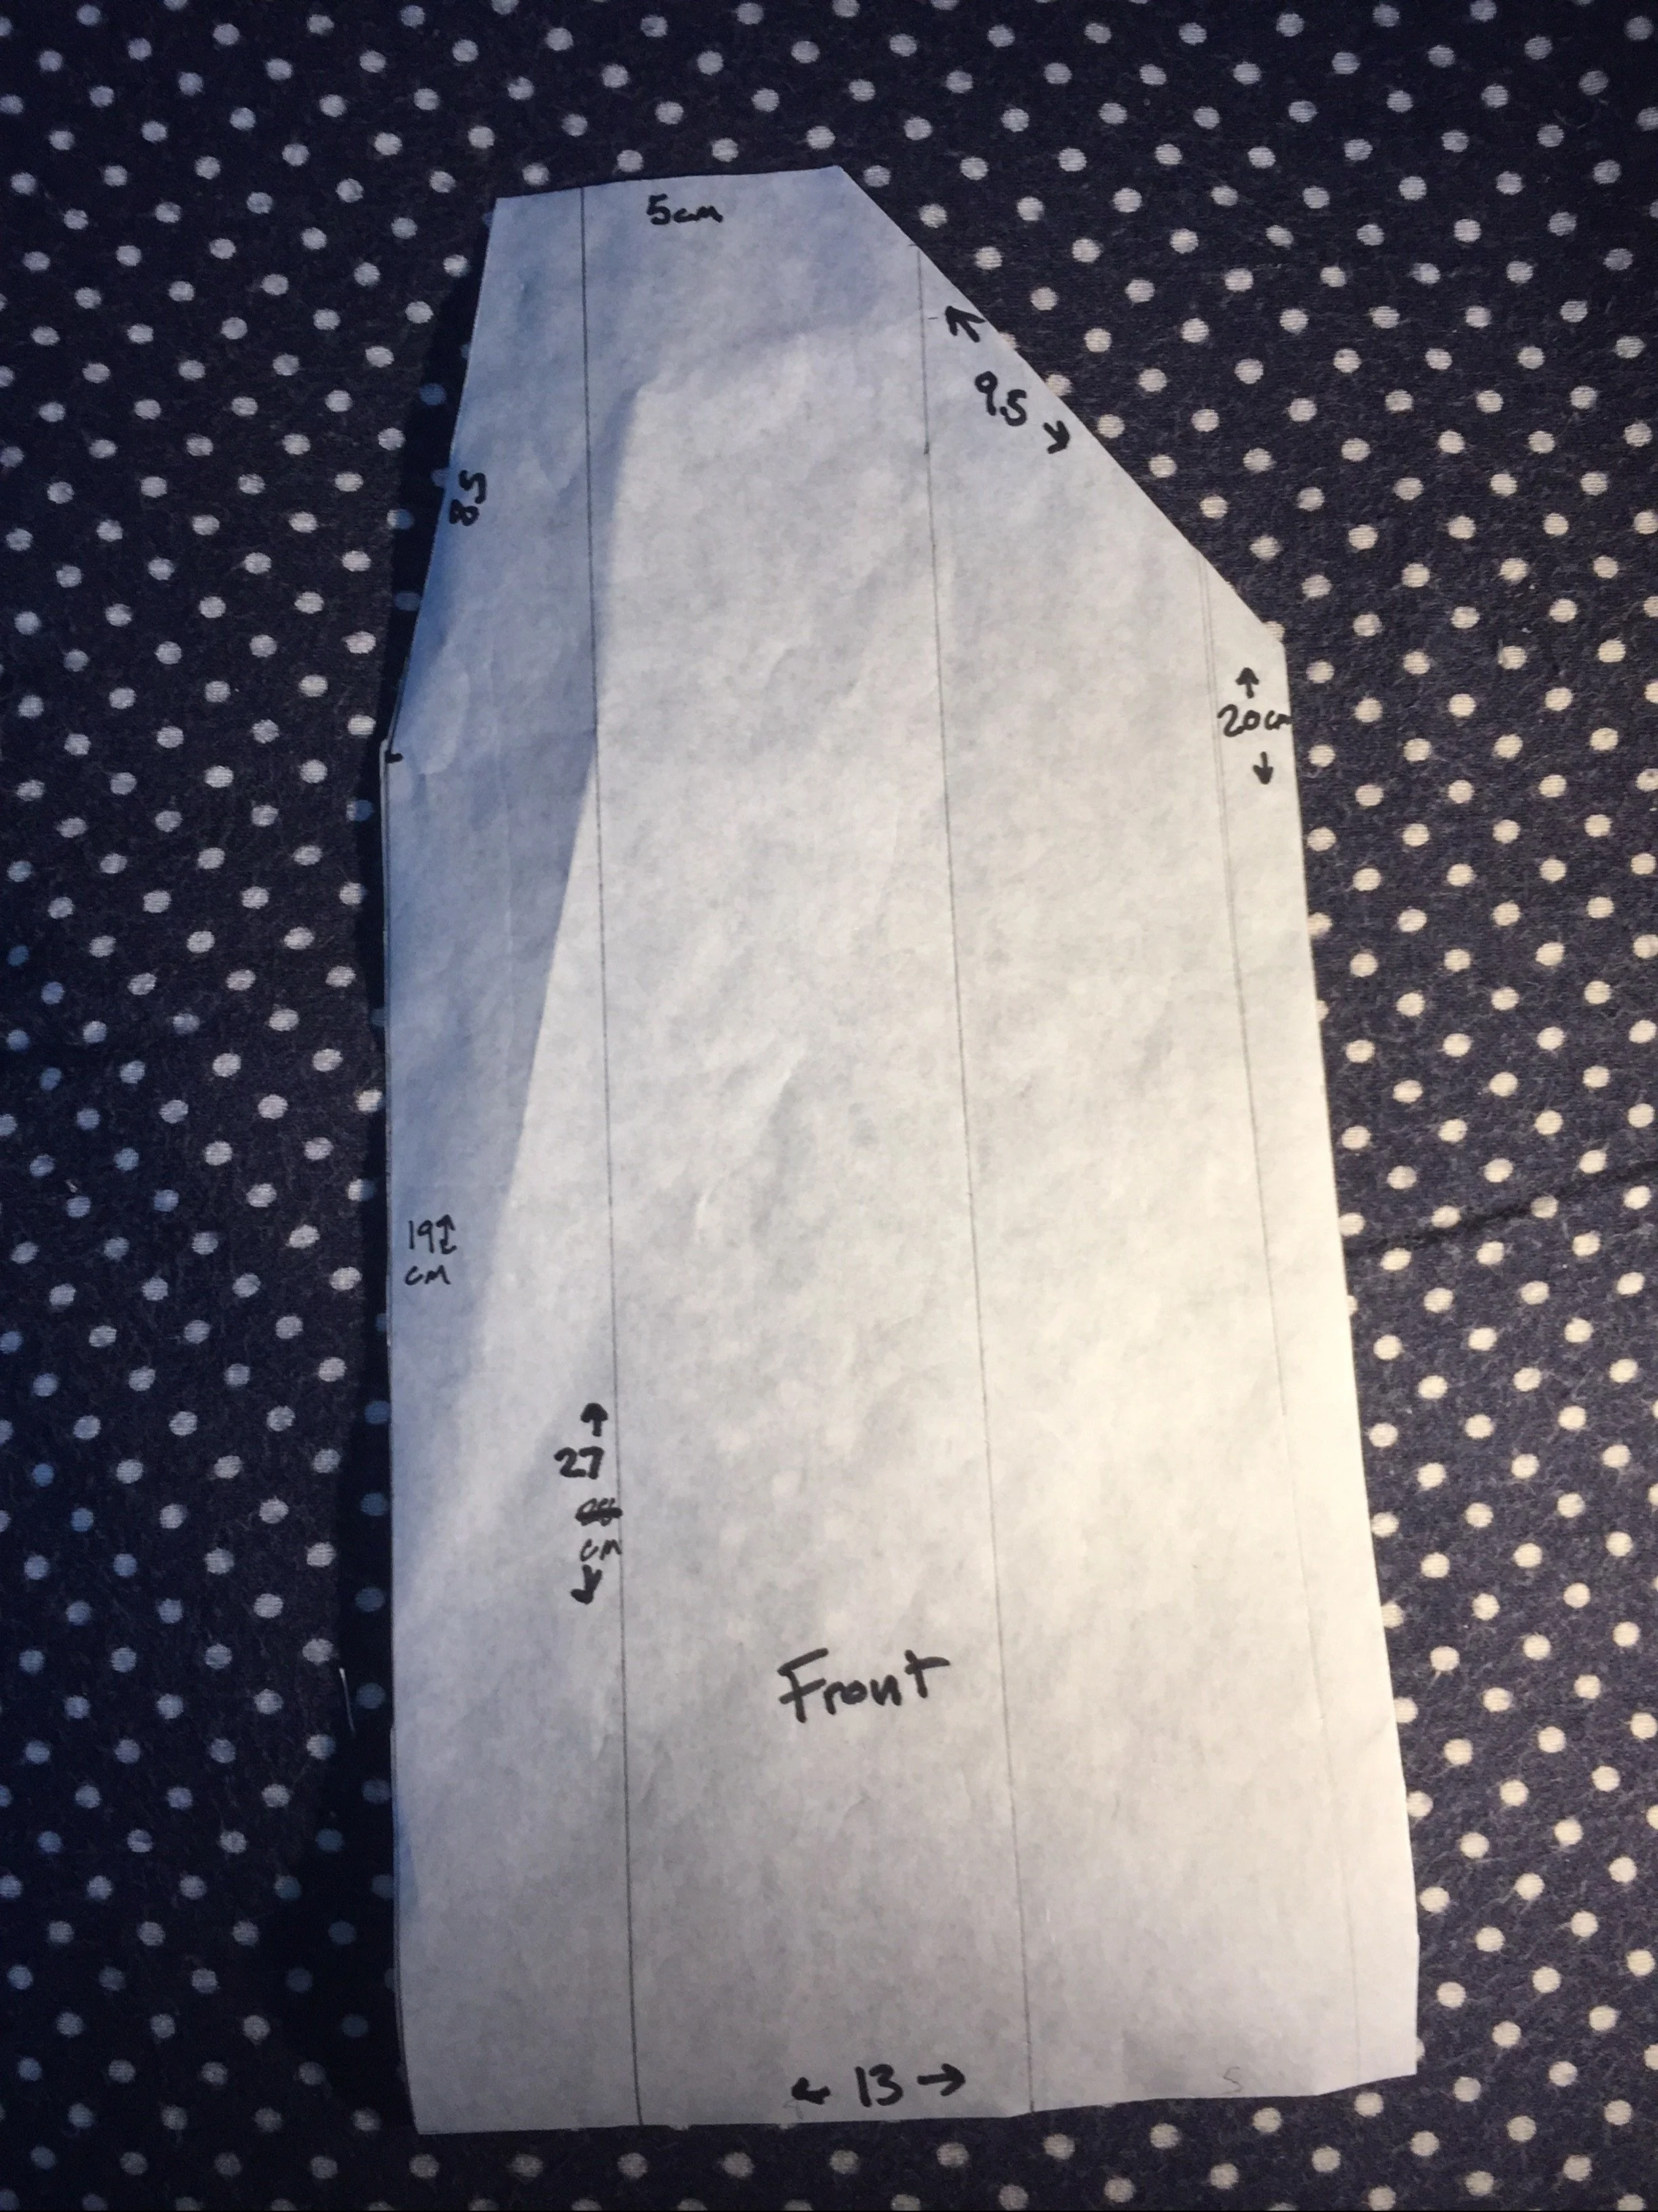
Front: cut two
On the back I serged up the long sides. On the front I serged all the way up the sleeve sides and then up until the neck angle on the sides that fold over.


These kinds of directions are why I’m calling this a loose play-by-play.

I joined the front pieces to the back.

I cut a 1cm snip at each side of the neck along the seam. The neck hole shaping is the thing that is most vexxing.


Putting wrong sides of the fabric together I measured a 7cm sleeve hole, stitched from the sleevehole to the hem. Then I pressed the seam open
I then folded the front panel inwards and stitched it.

I cut a neck sash 6cm by 36 cm.
This was an good width when I worked with thicker fabric and had a slightly larger neck-hole but too wide with thinner fabric. I’d change it to 5cm by 36cm for thinner fabrics.


I folded the neck sash length-ways and pressed it. Then I folded all the edges inside 1cm and pressed again. It’s like making a piece of bias tape but it’s not cut on the bias. If you do want to cut on the bias you can and it will make things easier.
I marked the 18cm in (half way) and pinned the sash to the back of the neck hole (right sides together) I stitched the neck sash to the body starting from the center of the neck-hole each time.

Really hard to make out, I know.
Then I folded the neck sash over and whip-stitched it to the inside of the body.

I tried it on Snow.
The 6cm width was just slightly too tall for her neck. Because the fabric is thin it buckled and looked wrong. Instead of seam ripping and making it smaller I decided to fold over the collar and whip stitch it, making a double-collar look.


I made a sleeve pattern.

serged edges again

I left about 7 cm open on each side.
It occurs to me now that I could have attached the sleeves to the body at an earlier point. That might be easier.
Too late.

Now to attach the sleeves.
I set the sleeves in. Sorry for not taking pictures of that...I may make a revised tutorial at some point.


I also stitched the serged edge to the inside of the sleeve near the doll hand so her fingers wouldn't forever be catching on the edge when the garment is put on.

Last, here she is with her hemmed and stitched kimono. At her feet is the fabric I'll use for the obi/sash tomorrow.
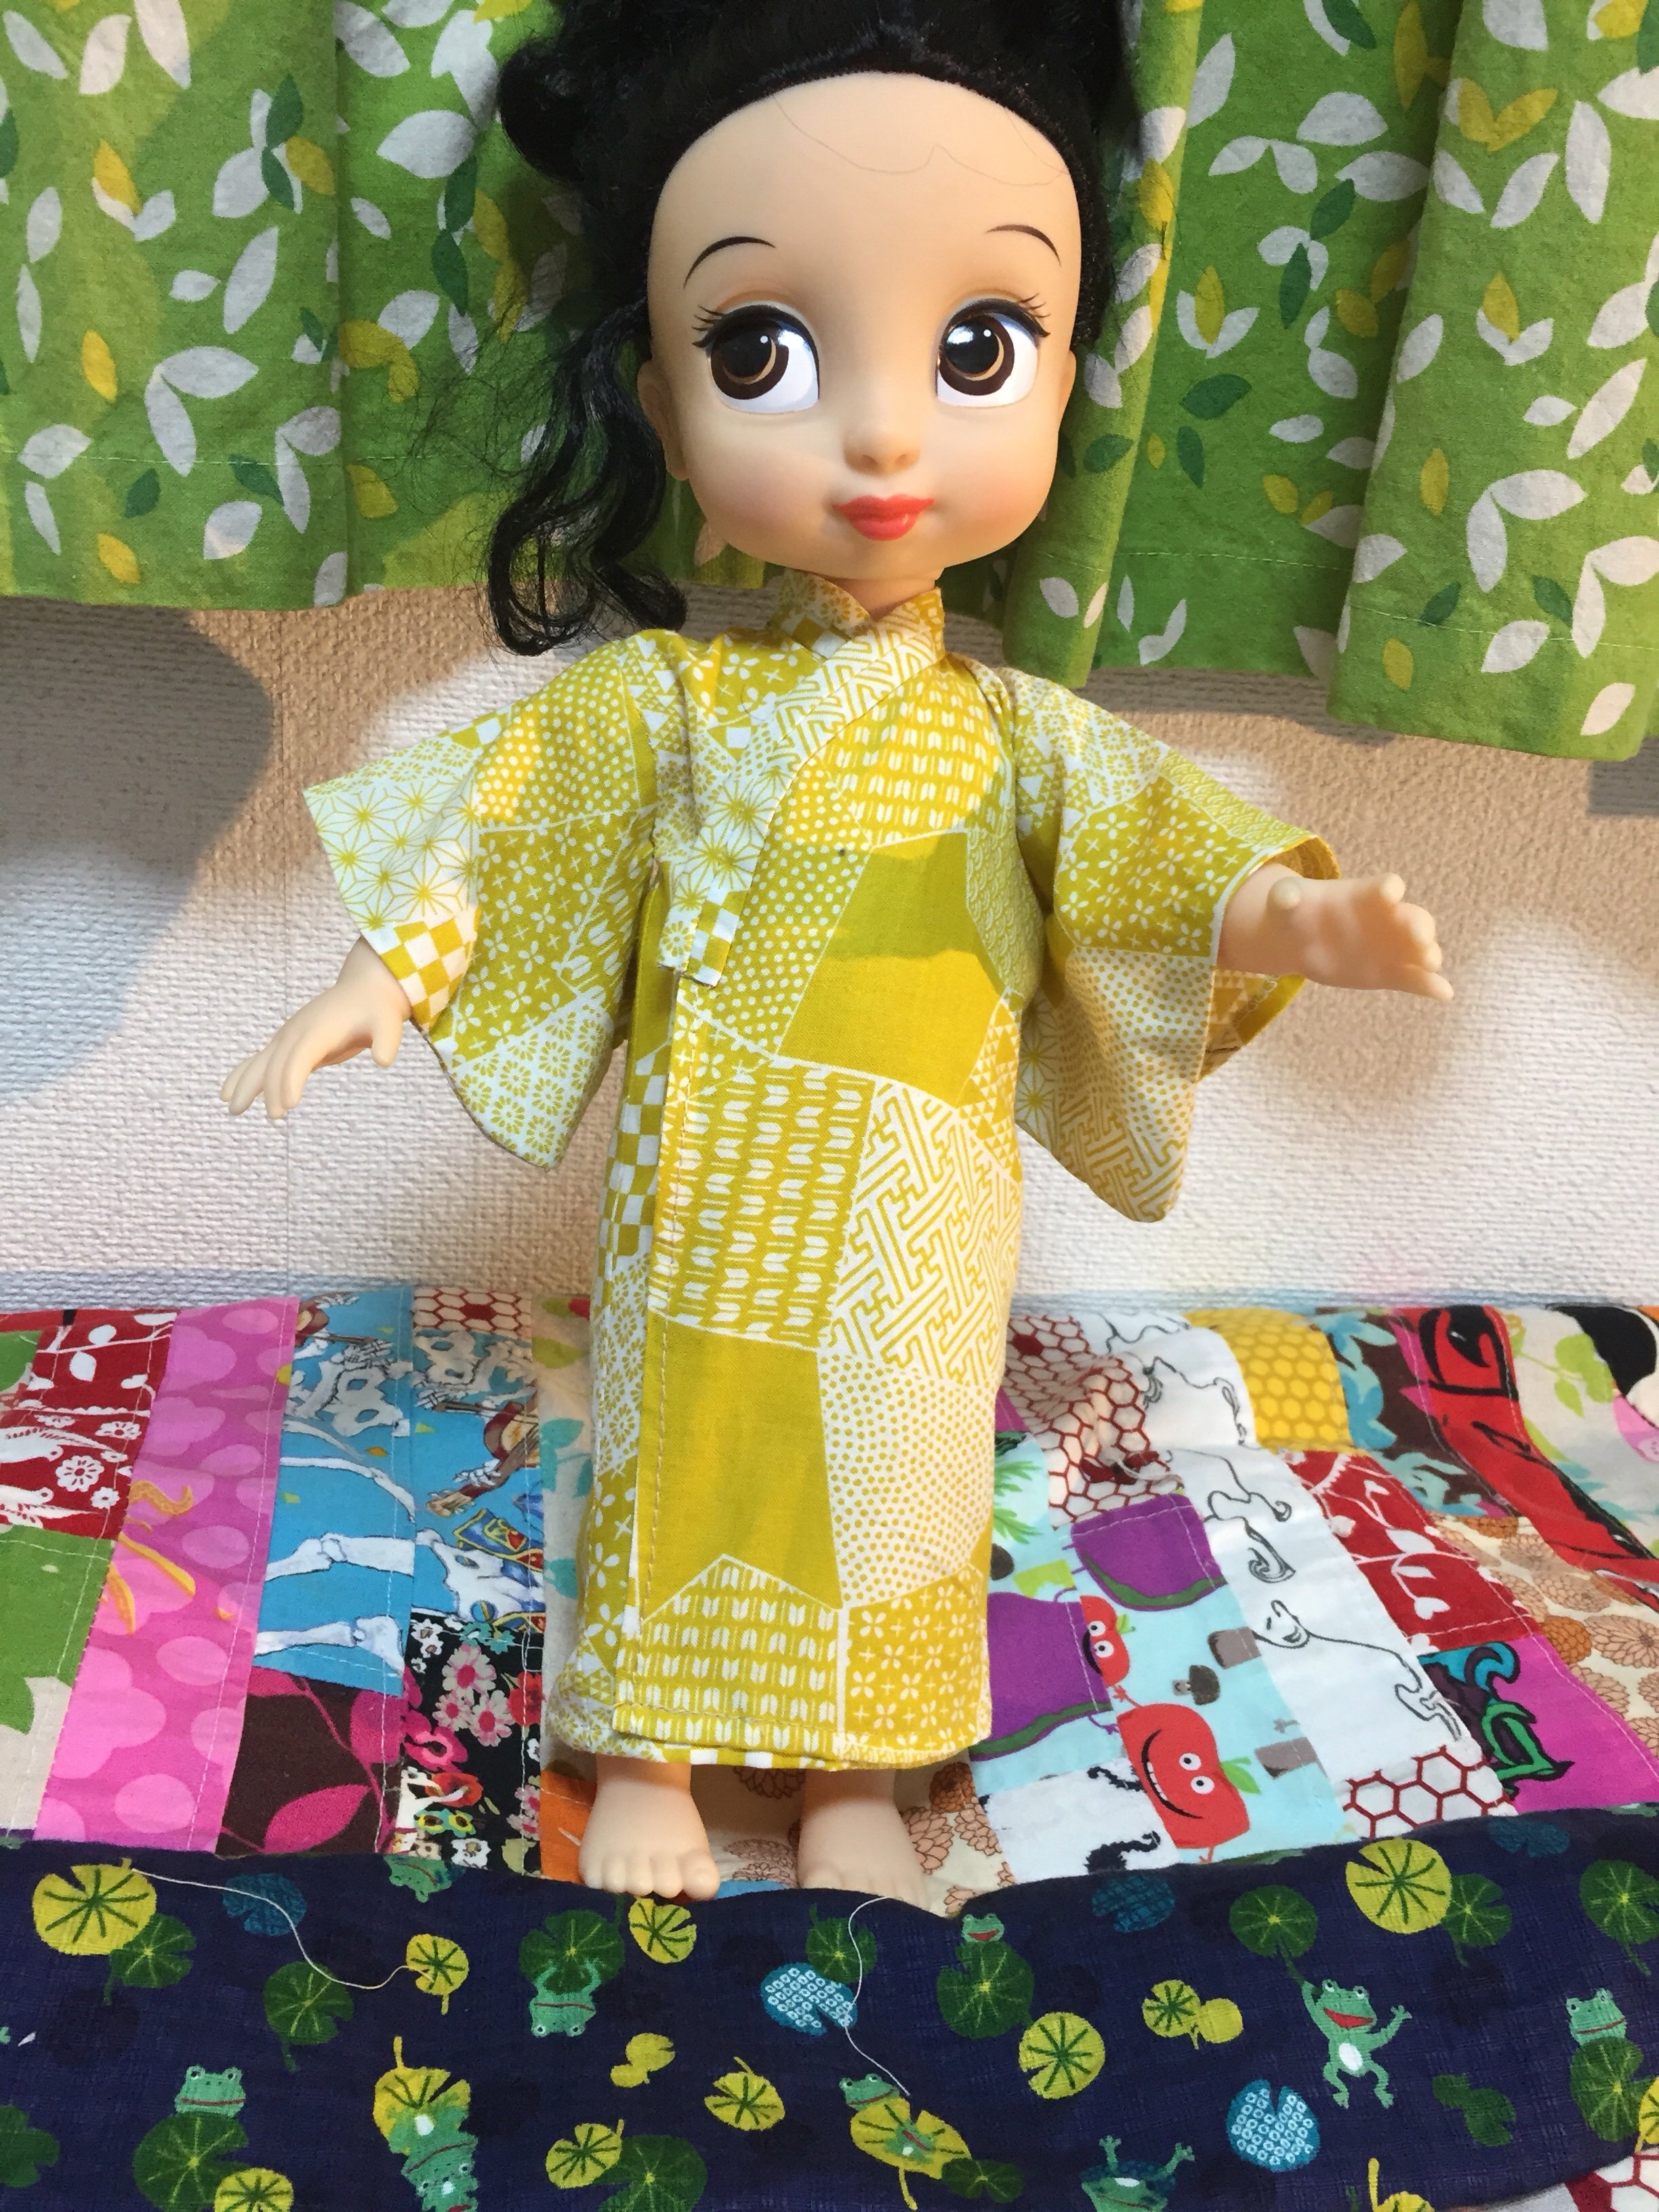
As a reminder, the correct way to close a yukata/kimono is that the left side goes over the right. The other way is only used for burials/death