Moana Wrap Dress Tutorial

I’m taking my Sunday to make a free tutorial. Why am I working for free? I’ve benefited from SO many online free tutorials that I’d like to give back.
Please don’t hesitate to give me feedback on what needs to be tweeked…or show me pictures if you use this.
Disclaimer: No one wants to read a story before a tutorial, they want to get the info, so my struggles will not be documented but know THEY EXISTED.
WHY?
Disney’s Animator’s Collection Moana has a different body size from the other Animator’s collection dolls. She’s wider in the tummy and chest. This is adorable but renders closely fitted dresses the other dolls wear too small. That’s why I made this. Her size shouldn’t limit play.
Here are links to PDF’s I made with the bare bones pattern. Let me know if there are issues with my links or PDF’s. I don’t have a printer at home.

The seam allowance is 1cm. I use centimeters in this tutorial because I live in Japan and it's what I use everyday.The pattern shows the front panels of the wrap dress and the back. Not pictured is the skirt because you'll just be cutting a rectangle 62cm wide and 13cm long.
Let's get started
Top: I’m using the red polka dot fabric for the outer fabric and the light blue for the lining. You don’t need to use a different colored fabric for the lining.
The reason I line these is because it will protect the raw seams. These dolls are for kids and kids are dirty. The things they play with need to be washable.

Skirt:
Cut a rectangle 62cm wide and 13cm long.
I didn’t have fabric long enough so I added some to the right hand side with a french seam. Realistic tutorial. If you’re adding 20cm or less to get the 62cm length, the seam will be hidden by the wrap.

Before you start sewing
When was the last time you changed you machine’s needle? If you can’t remember, do it now. Needles wear out quickly. It’s a good to get in the habit of changing them each time you start on a project.

When was the last time you changed you machine's needle? If you can't remember, do it now. Needles wear out quickly. It's a good to get in the habit of changing them each time you start on a project.
Also
Have you read through this WHOLE thing first? Free tutorials don’t always flow well or give you the information when YOU need it. This one, for example, doesn’t even tackle the notions you’ll use until the very end…because I illustrate three different ways to finish the dress.
If you use the last method “Out of Order Mixed Method” you’ll want to read it before you start putting everything together. I’ll put a OOMM* astrix where it might be helpful
OK! Constructing the Top
Join the front of the wrap top to the back at the shoulders.

Press seams with an iron and then press them open.

Snip the edges to reduce bulk.
Multiple layers of cotton fabric on a human body is negligible but on a doll they quickly add to bulk.

Now to stitch the lining to the outer fabric.
Put the right sides of the fabric together and pin or clip to hold in place.
OOMM* if planning to use OOMM, insert your ribbons between the fabric before stitching.

Sew the neckline and the arm holes.

Liberally snip away triangles before turning it right side out.
I could have done more triangles.

Now turn the top right side out by pulling the wrap/front through the shoulder openings.

I’m using a special tool to hook the fabric and pull it through. This isn’t essential but it makes life easier.

Turned right-side out BEFORE pressing.
Get your iron and press that out.

Now it’s time to join under the arm holes.

Use your iron to get inside the lower part of the arm holes where you’re going to join them together and press those seams open.
Pin the lining to lining and the main fabric to main fabric (right sides together) as seen below.

And sew.

Stitch under both arm holes and press those seams open.

Snip to reduce bulk.

Now press your lovely top and cheer for yourself.

Mid-Project Check-in

If you're feeling hungry or tired and are trying to work through it as not to lose your sewing mojo.
STOP.
If you're tired or hungry you're going to make mistakes.
Eat or rest or whatever you need to do. ONLY THEN return to your project.
Skirt Construction.
Fold the edges the fabric in 5mm and press.
Fold in 5mm again and press again.
Stitch this hem into place


On the bottom long edge of the skirt fold 1cm and press. Fold in another 1cm and press. Stitch this hem into place.

After hemming your skirt should be 60cm wide. With a fabric pen or fabric chalk, you’re going to mark the edge you’ll gather. Mark at 22cm and 38cm. This means your 60cm length will be visually divided into a 22cm section, a 16 cm section and another 22cm section. 22+16+22=60cm
These marks will help us line up the skirt with the side seams when gathering to help keep gathers even.
First blurry picture. Sorry.

Maths: You can skip this if you don’t care where those numbers come from. If you plan to make a fuller skirt with a longer rectangle it’s worth reading.
The bottom edge of the top you assembled is 45cm long. First wrap section 16.5cm, back, 12cm, second wrap section 16.5=45cm. 16.5+12+16.5= 45cm
We’re taking a 60cm long fabric and will gather it until it’s 45cm. ( 60 divided by 40 is aprox 1.35. 60cm is aprox 135% the size of 45cm. 6
Because we want to try to evenly distribute the gathers it helps to mark the skirt fabric where it will join the seams on the top.
16.5x1.35=22.275 (we’ll round that to 22cm) 12 x 1.35=16.2 (we round that to 16) and check the math 22+16+22=60cm.
If you want a fuller skirt, say 70cm after hemming. 70 divided by 45 is aprox. 1.55. Multiply 16.5 and 12 by that 1.55…double check…and that’s where you’ll mark.
Maths over
To gather the skirt we need to sew two seams along the top edge of the skirt, closer to the edge than 1cm (our seam allowance). Keep the seams wide (3 or 4 stitch setting), don’t back stitch and don’t cross the seams.
We’ll be machine joining the to the outer-shell of the wrap top, NOT the lining…but first, gathering.
If you’ve never gathered using this method, enjoy a youtube tutorial.
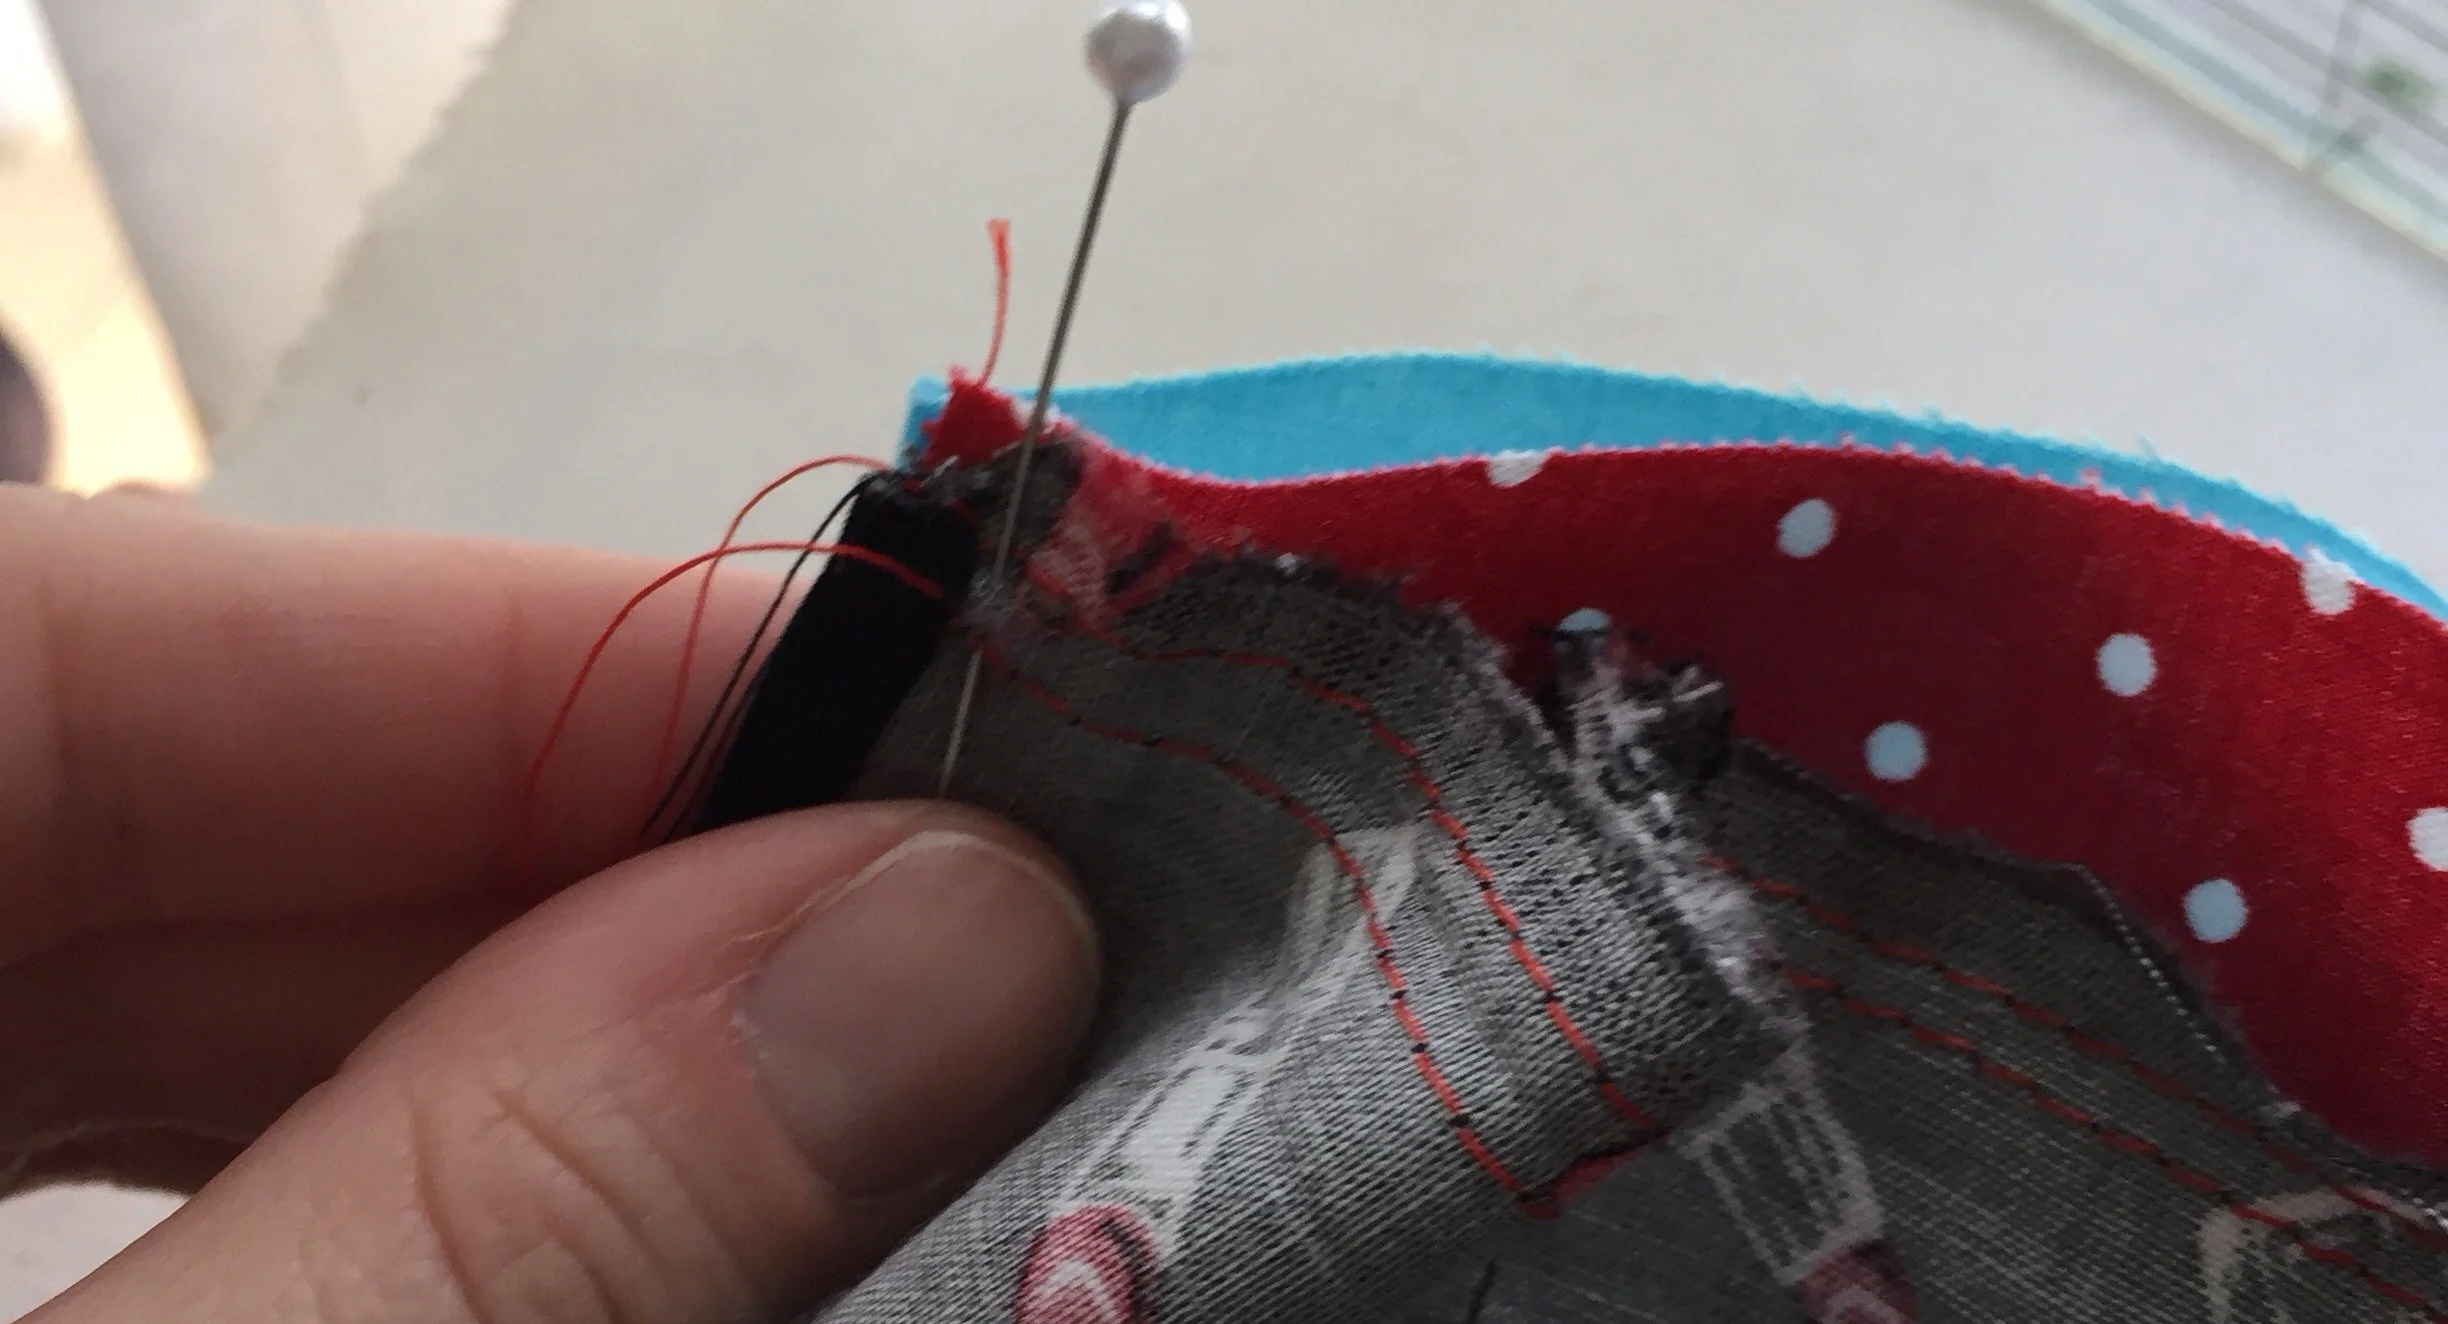
I’ve used a red thread in the bobbin and a black thread on top to make it easier to see.
You’ll be pulling at the bobbin threads (the threads on the underside) to gather the fabric.

You’ll hold the fabric in one hand and pull the bobbin threads with the other. There’s a lot of moving the gathers with your fingers so they are evenly distributed. You do this at both edges of the fabric.
Use the marks on the skirt and the seams of the wrap top to make sure the gathers are evenly spread along the skirt.

All pinned! Now sew the skirt to the outer fabric (right sides together).
I prefer not to sew over pins, to reduce the chance of my machine needle breaking. Instead I stitch slowly and remove the pins right before they’re about to go under the presser foot.

Blurry picture. Sorry! T
he skirt is now joined to the outer shell of the top. Press so the raw edges are pointing up.

Now turn the edges of the lining under. Pin and whip-stitch by hand.
Turn your piece over from time to time to make sure your stitches don’t show from the outside.
Steam or press when finished to smooth out wrinkles on the outside.

We are so close to being finished!


Now let’s tackle how to close the wrap dress on your doll.
How to close the dress:
3 methods.
1st way: Top Stitched Ribbon Method.


This ties at the side. I wish it tied in back. I’ll give measurements for both a side tie and back tie.
Both use 1 meter of ribbon.
SIDE TIE (pictured): 42 cm ribbon. Start stitching after 18cm (the tie part) from the edge to a little more more than the center of the back to the edge of the “top” wrap (24cm stitched to dress).
Back Tie (not pictured): 52cm ribbon. Start stitching after 28cm (the tie part) to a little more more than the center of the back to the edge of the “top” wrap (24cm stitched to dress).

SIDE TIE (pictured): Now take the 58cm ribbon. Tuck the end in and start stitching it from the other edge of the dress to 24cm. You should have 34cm to tie with.
Back Tie (not pictured): Now take the 48cm ribbon. Tuck the end in and start stitching it from the other edge of the dress to 24cm. You should have 24cm to tie with.

Last, use Velcro/Magic tape or a snap to keep the inner flap in place. Put the dress on the doll and mark where to attach with fabric pen/chalk.
FINISHED!

2nd Way: Snaps or Velcro/Magic tape method.

This is the easiest version. Put the dress on the doll. Mark where notions should go with fabric pen/chalk.
Stitch notions on the inside to lining and on the outside through the outer layer or both layers. You could also use a loop and button on the outside. Go crazy.
FINISHED!
3rd Way: Out of Order Mixed Method


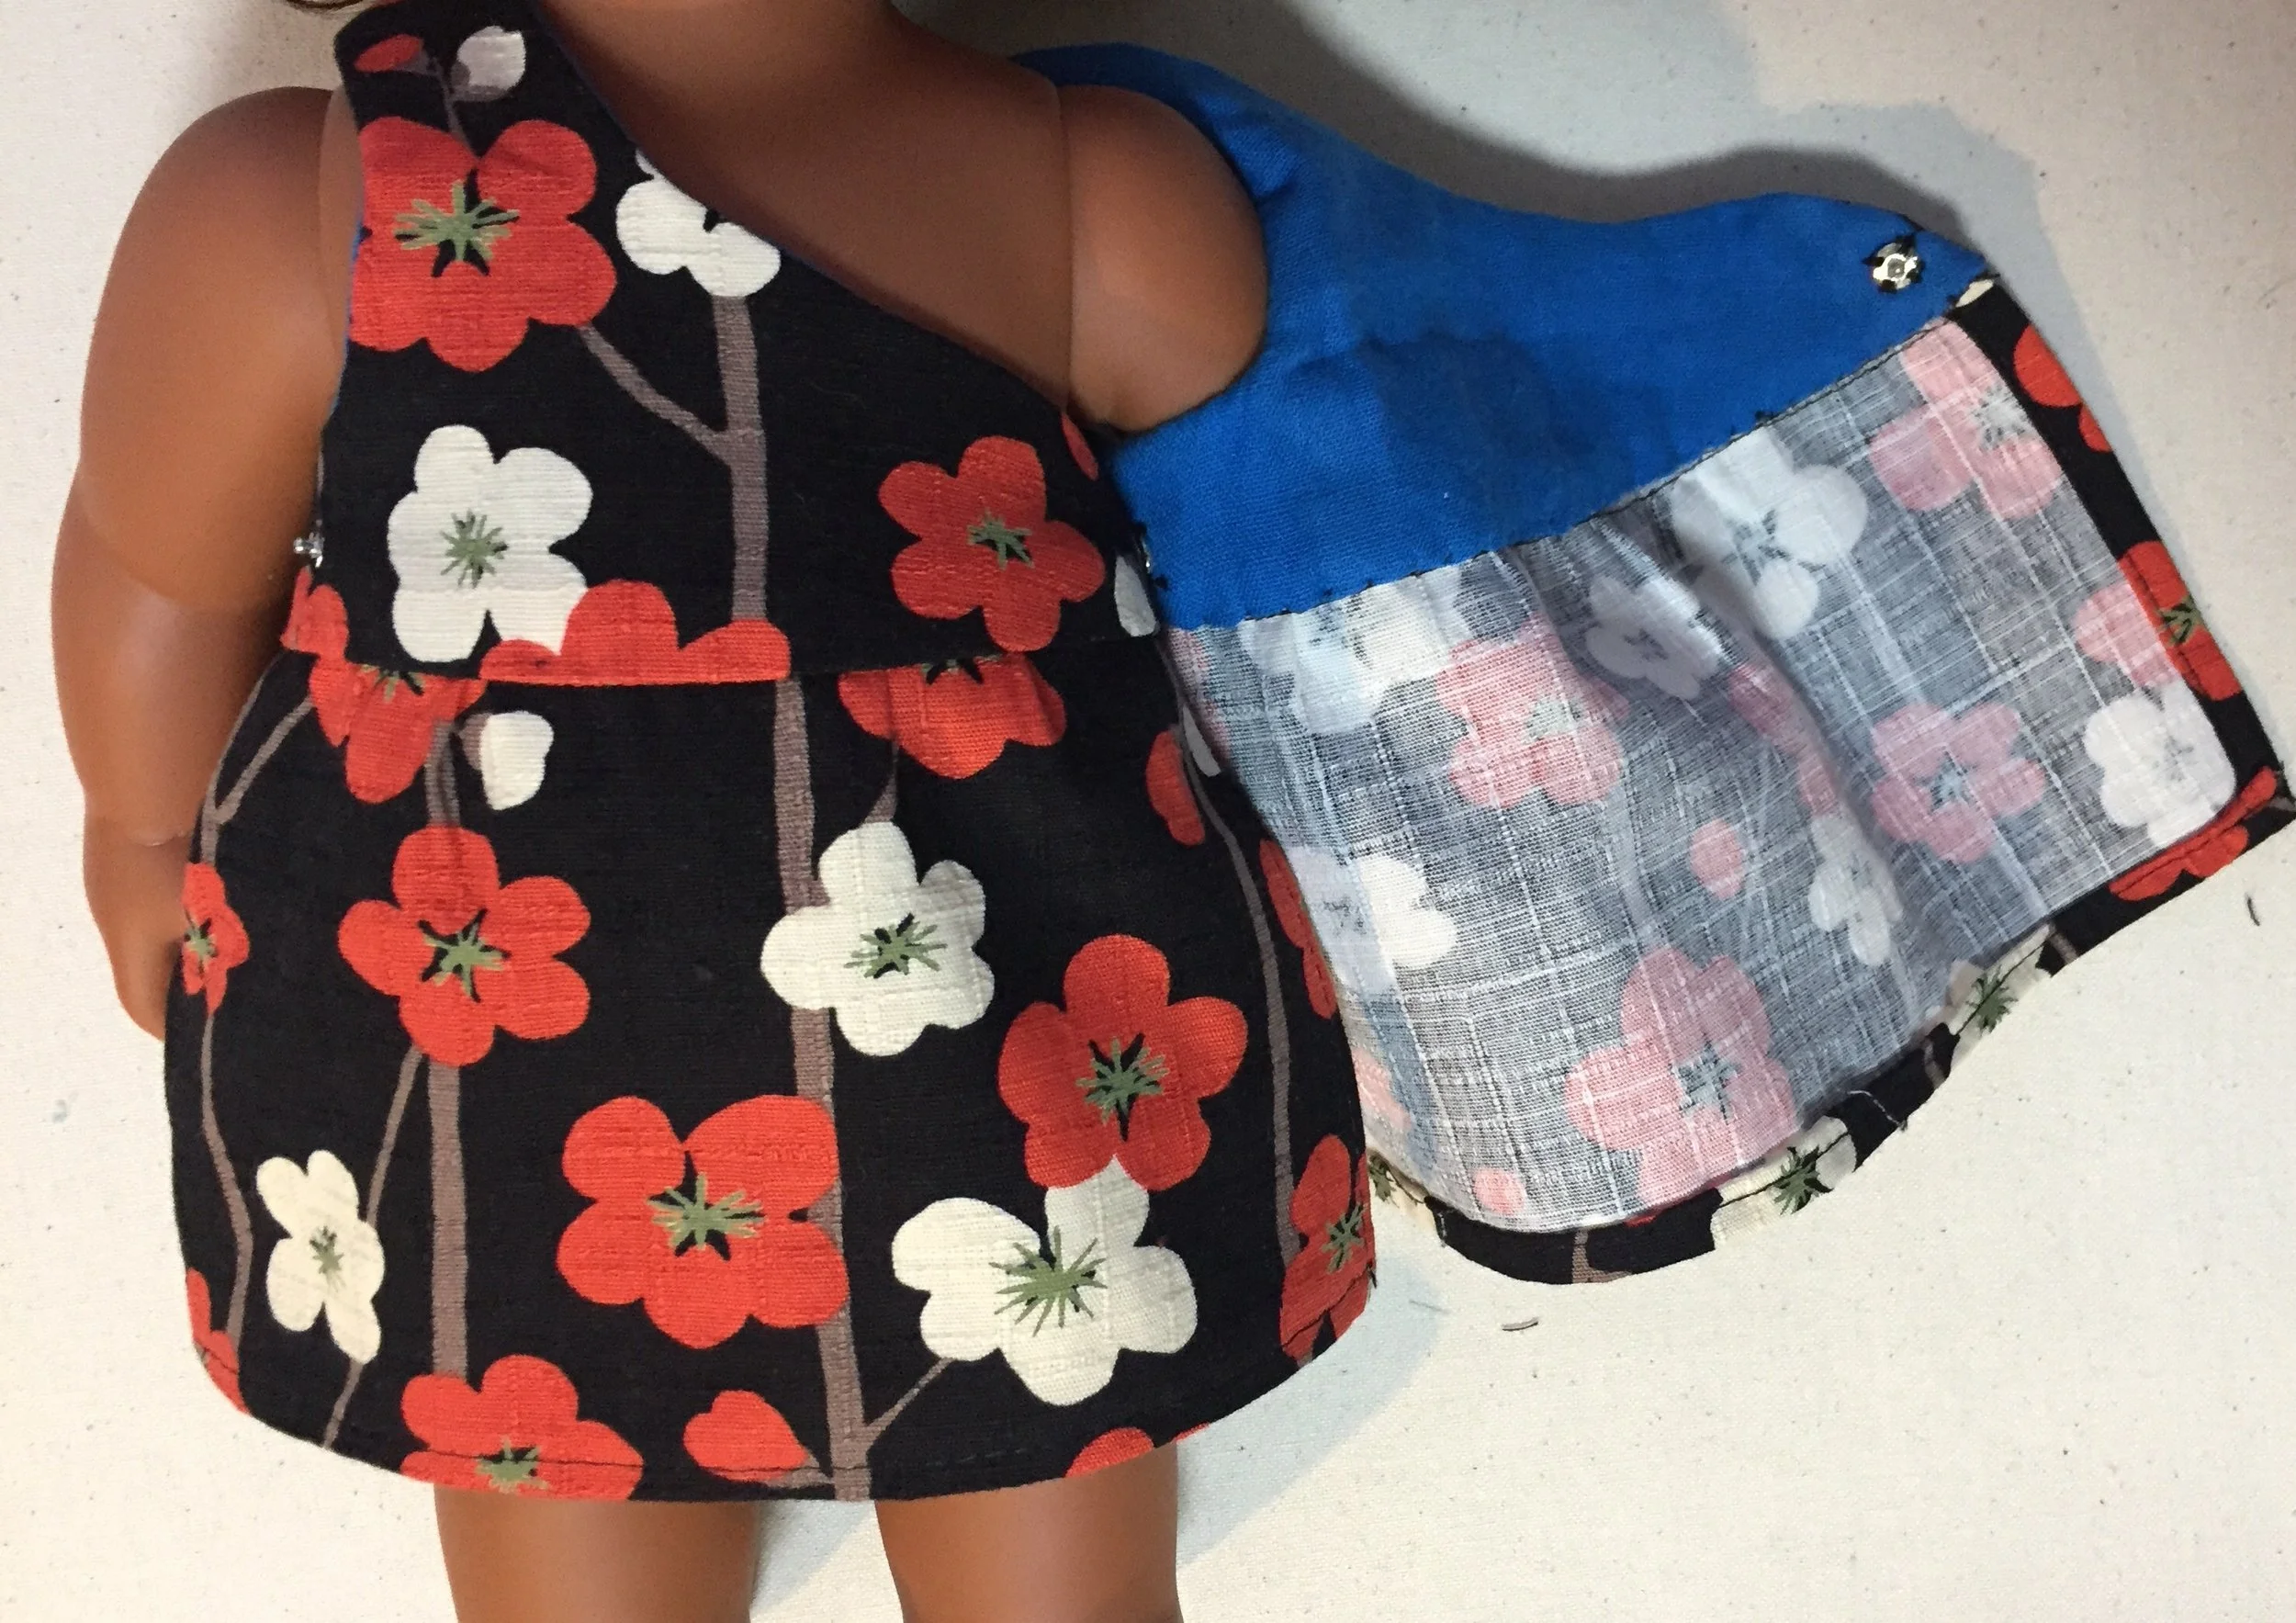
This is a fuller skirt made from a 70cm long rectangle.
This method is out of order because I thought if it AFTER finishing the dress body. It would have been easier to do some of these steps while putting it together.
This method uses two 30cm long ribbons. I opened the seams at the edge of the wrap top, inserted the ribbons and stitched them in place.
I SHOULD have just stitched the ribbons in place when joining the lining to the outer fabric at the neckline and arm holes
In a perfect world I would have used light blue bobbin thread and red top thread to reduce stitch visibility.
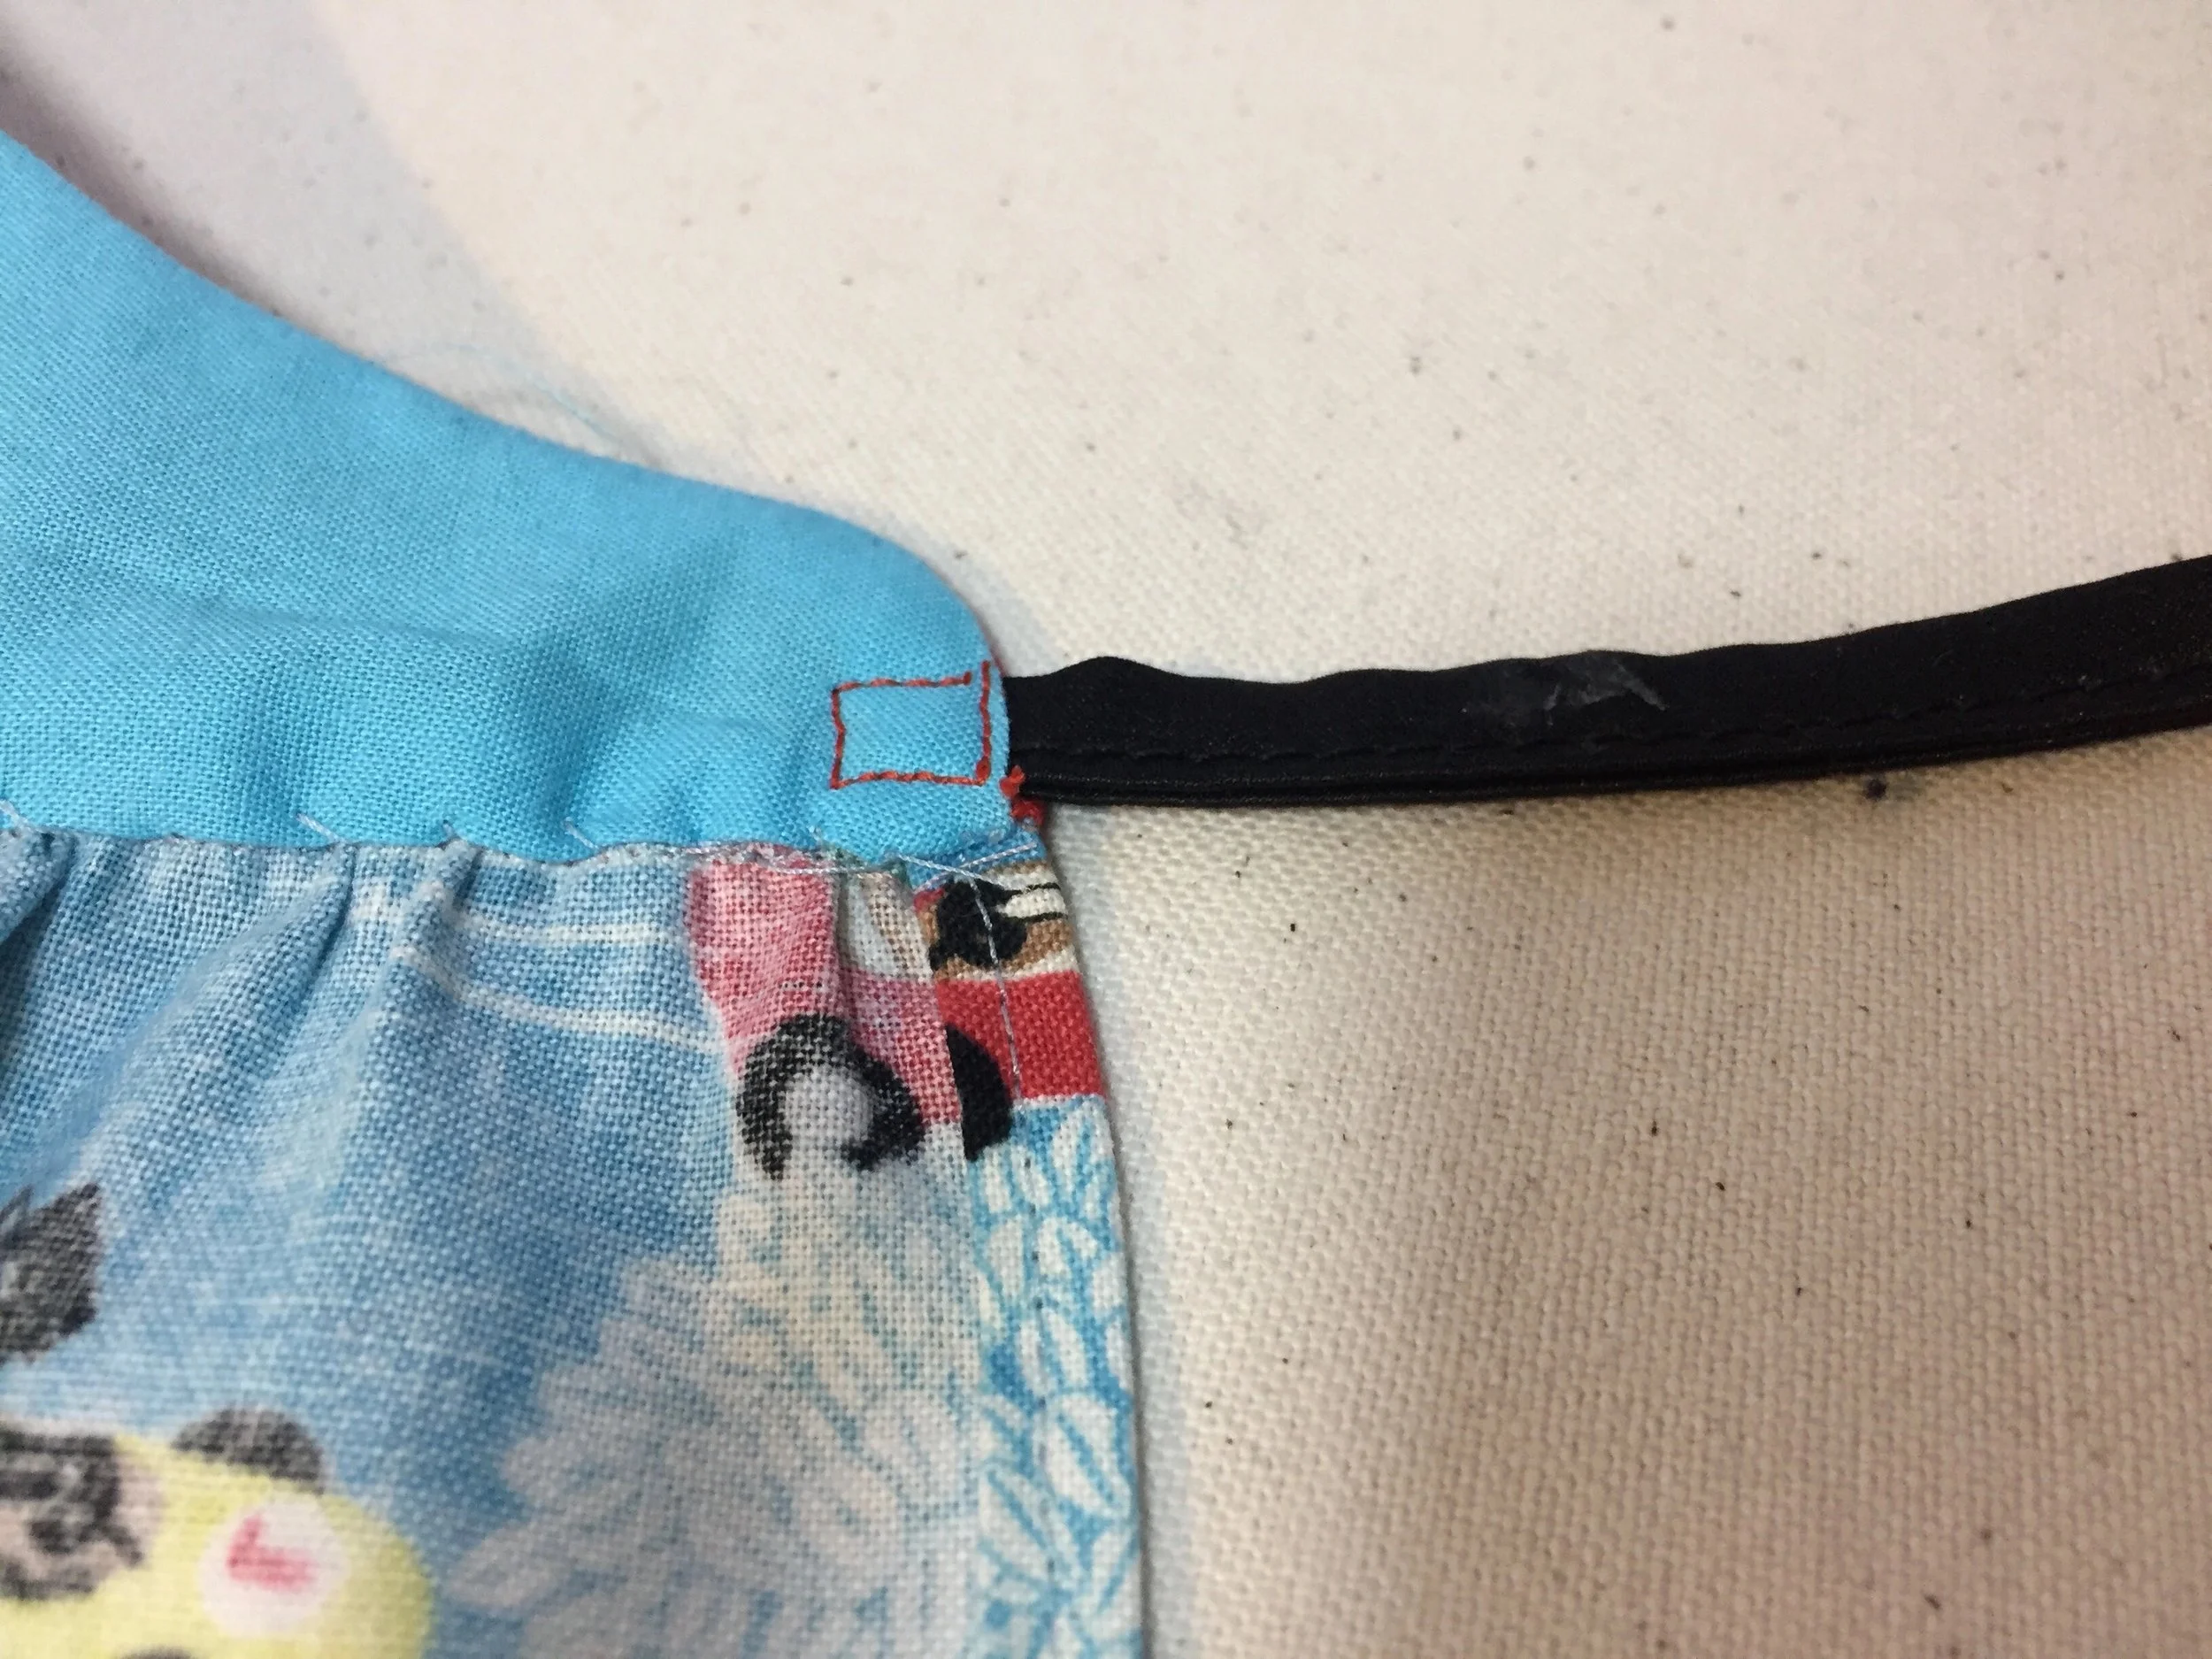

Then I opened the seams under one arm and made a button hole. The button hole pictured is really rough. If I give this to anyone I’ll un-stitch and re-do this buttonhole.

Thread one ribbon through the button-hole and tie in back.
Finished!